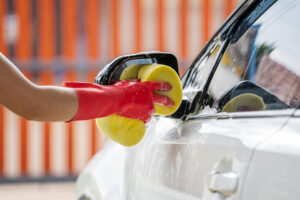
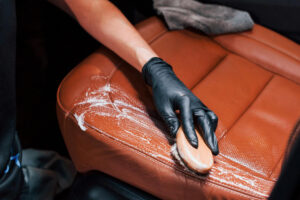
How to Clean and Moisturize Car Leather Table of Contents1...
Read MoreHow to Remove Scratches from a Car Dashboard?
Table of Contents
- 1 How to
Remove Scratches
from a Car Dashboard?
- 1.1 Why Dashboard Scratches Are Common in Abu Dhabi
- 1.2 Identify the Type of Scratch First
- 1.3 Check Your Dashboard Material
- 1.4 Tools You Will Need
- 1.5 How to Remove Light Scratches (Safe, Quick Method)
- 1.6 How to Remove Medium & Noticeable Scratches
- 1.7 How to Fix Deep Scratches or Gouges
- 1.8 Leather Dashboard Scratch Repair
- 1.9 Safety Mistakes to Avoid (Most People Do These)
- 1.10 When You Should Not DIY (Seek Help in Abu Dhabi)
- 1.11 How to Prevent Future Scratches
- 1.12 FAQ
- 1.13 You may like!
- 1.14 How to Clean and Moisturize Car Leather
- 1.15 How to Remove Pet Hair From Car Carpets (Madaffah, Abu Dhabi Guide)
- 1.16 Can a car wash remove wax or polish?

There is no “single” rule for fixing scratches on a car dashboard; the method depends on the depth of the stain and the dashboard material. Light scratches usually heal quickly; medium scratches require extra care; and deep scratches may require filler/putty. You can understand the quick solution below in just one minute:
- Light scratches: Clean, blow dry, buff with a soft cloth.
- Medium scratches: Rub very lightly with fine sandpaper, use interior polish.
- Deep scratches: Fill the spots with filler/putty, fix the pattern with a texture pad.
- Dashboard material matters: plastic/vinyl/leather; each requires a different method.
- Heat safety: Never give off excessive heat; the dashboard softens quickly.

Why Dashboard Scratches Are Common in Abu Dhabi
Scratches on the dashboard are a very common occurrence due to daily use. Be it in Madaffah or the Abu Dhabi area. When you leave the car parked outside for a long time, the upper part of the dashboard can quickly become damaged. Below are the most common causes.
Sunlight & UV damage in Madaffah
The intense sun in Madaffah quickly softens the dashboard’s plastic or vinyl. Even slight pressure or friction can cause scratches. Prolonged exposure to the sun dries out the dashboard, making minor scratches more visible over time.
Dust from parking areas
Many parking spots in the area accumulate sand and dust. These sit on the dashboard, and when wiped with hands or a cloth, the fine sand particles create friction, leaving new scratches.
Daily use items like keys, phone mounts, bags
When getting in and out of a car, items like keys, mobile phone holders, charging cables, and small bags can come into contact with the dashboard, leaving light stains. These stains are especially easy to see on plastic dashboards.

Identify the Type of Scratch First
Before fixing the dashboard, you need to determine the type of scratch. Each stain reacts to a different method, so when you identify it correctly, you can solve the problem quickly. Below are the 3 most common types of scratches explained.
Scuff marks
These are usually very light marks, caused by light friction from shoes, bags, or hands. Scuff marks do not penetrate deep into the dashboard, but only create a slight discoloration on the top layer. You can fix these marks with a simple cleaning and light buffing.
Light surface scratches
These are not scuffs, but rather slightly deeper. They are usually caused by rubbing against keys, phone holders, or complex objects. Light heat, buffing, and a little fine sandpaper help you remove these scratches.
Deep scratches or gouges
Deep scratches occur when a layer of plastic or vinyl breaks down, creating a hole or deep mark. Simple DIY won’t fully fix these. You may need filler or putty, the right texture pad, and sometimes even a small repaint to repair them properly.

Check Your Dashboard Material
If you don’t understand the dashboard material, you can easily make a mistake when you try to fix a scratch. Different materials react differently to heat, polish, sanding, or filler. Below are three common materials and the problems they can experience with heat.
Plastic dashboard
Plastic dashboards are the most visible and the most prone to scratches.
- Light stains fade with heat and buffing
- Medium stains require fine sandpaper + polish
- Deep scars may require fillers.
Vinyl dashboard
Vinyl is softer and more textured than plastic.
- Clean + mild heat works on light stains
- The texture pad is more useful for matching textures
- You should use vinyl putty to smooth out deep stains.
Leather dashboard
The leather dashboard also looks nice, but it is very susceptible to scratches.
- You can fix very light scuffs with a bit of conditioner.
- Deep stains require leather filler + color match
- Excessive sanding or heat can damage the leather.
Tools You Will Need
Fixing scratches on your dashboard doesn’t require much heavy equipment. Here’s a list of tools you can safely use at home, even in Abu Dhabi’s hot weather.
- Microfiber cloth: Safest for cleaning and buffing dust.
- Interior cleaner: Use a mild cleaner to clean the surface.
- Mild polish/scratch remover: Effective for light and moderate scratches.
- Heat gun/hair dryer (low heat only): Used to soften vinyl or plastic; do not apply excessive heat.
- Fine sandpaper (800–1200 grit): Light sanding is proper for medium scratches.
- Filler putty (for deep scratches only): Used to even out deep scratches.
- Texture pad: Helps to match the pattern after repair.
- Dash protectant (UV shield): Protects the dashboard from becoming stiff and brittle in the Abu Dhabi sun.

How to Remove Light Scratches (Safe, Quick Method)
You can repair light scratches on the dashboard with a little effort. If you follow the three steps below correctly, the stains on plastic or vinyl will disappear very quickly.
Step 1 (Clean the scratched area)
First, clean the dust with a microfiber cloth. Then use a mild interior cleaner to clean the area around the stain thoroughly. Any dirt or dust left behind can cause finer scratches when buffing, so this step is very important.
Step 2 (Apply controlled heat)
Mild heat softens the plastic or vinyl a little, making the stain easier to remove.
- Set the hair dryer on low heat.
- Heat for just a few seconds
- Please don’t hold it in one place.
Step 3 (Buff with polish or interior coating)
Now, apply a little polish or scratch remover to a soft cloth, then buff the stain in a circular motion with light pressure. The polish will smooth the plastic’s surface, making the stain almost invisible. Using products that provide UV protection will also help reduce future scratches.

How to Remove Medium & Noticeable Scratches
Simple buffing won’t fully repair moderate or noticeable scratches. However, with a bit of extra care and the right methods, you can still fix them beautifully. The three steps below work well on most plastic and vinyl dashboards.
Step 1: Wet sanding with 800–1200 grit
First, soak the fine sandpaper in water.
- Use very light pressure.
- Rub only on the scratched area.
- Apply light, even pressure, not in a circular motion
Wet sanding evens out the highs and lows of the stain and reduces its depth.
Note: Excessive rubbing can cause the surface to look faded, so go slowly.
Step 2: Heat + texture blending
After sanding, slightly heating the scratched area softens the surface, allowing the texture to settle more easily.
- Use a hair dryer on low heat.
- Do not heat for more than 3-5
- After heating, apply the texture pad with light pressure.
At this stage, the dashboard pattern looks normal again.
Step 3: Apply dashboard restorer
As a final step, use a dashboard restorer or mild interior polish.
- Take a soft cloth.
- Buff slowly in a circular motion.
- Apply a little around the stain as well, so that the color and shine are even.
In this step, the scratch marks blend in, making the entire surface look normal and clean.
How to Fix Deep Scratches or Gouges
A simple DIY won’t fully repair deep scratches or gouged areas, but if you follow the right steps, you can still hide the damage nicely in most cases. This method works for both plastic and vinyl.
Step 1: Clean & smooth raised edges
If the plastic or vinyl around the scratch is a little raised, fix that first.
- Clean the area with a mild interior cleaner.
- Smooth the raised area with fantastic sandpaper.
- If necessary, cut off the excess very carefully with a blade.
Warning: Rubbing too much can make the stain appear larger, so only treat the high areas.
Step 2: Apply filler/putty
Use filler or vinyl putty to fill the deep part.
- Apply a thin layer
- Even out with a small spatula or card.
- Apply a second layer if necessary.
If the filler layer is even, it is easier to create texture in the next step.
Step 3: Use a texture pad
This step is important to maintain the dashboard’s original texture.
- Press the texture pad while the filler is still slightly soft.
- Please do not keep it in one place for a long time.
- Make sure the texture matches the surroundings.
Step 4: Light sanding & repainting (if needed)
Check the area when the filler is completely dry.
- If there are any uneven spots, sand very lightly with 1200
- If there is a slight color difference, use a matching interior paint.
Tip: A little paint touch-up helps the dashboard look like a factory finish.
Leather Dashboard Scratch Repair
Leather dashboards, while looking high-quality, are very susceptible to scratches. The repair method varies depending on the depth of the scratch. Below are simple and safe methods for both light and deep scratches.
Light marks: leather conditioner method
Light scratches or scuffs usually only affect the top layer of leather. They are not too difficult to fix.
- Clean the area with a soft cloth.
- Use a good-quality leather conditioner.
- Apply with very light pressure in a circular motion.
- Let dry and buff lightly again.
Deep marks: filler + color match
In case of deep scratches, conditioner alone is not enough. Here, you must use the filler very carefully.
- Clean the place.
- Use leather filler according to the depth of the scratch.
- Even out with a thin layer
- Wait until completely dry.
- Then use a color-matching compound that matches the leather’s color.
When leather needs professional repair
Improper repairs to leather can make the stain look worse instead of better. So it’s better to seek professional help rather than DIY in the following situations:
- The scratch is too deep or torn.
- Difficult to match colors
- Textured leather surface
- Leather previously damaged by heat or sun.
Professional repairs restore the texture, color, and finish to their natural state.
Safety Mistakes to Avoid (Most People Do These)
Many people make mistakes when fixing scratches on their dashboard, which can turn minor blemishes into bigger problems. Using the wrong method can lead to cracking or discoloration of the dashboard. Avoiding the following mistakes will make the repair much safer.
- Overheating dashboard with a heat gun: Excessive heat softens and deforms the plastic, and a car dashboard in the sun is already hot, making it even more dangerous.
- Using stiff brushes or harsh chemicals: Harsh cleaners or stiff brushes can damage the surface of plastic and vinyl, creating new scratches.
- Rubbing too aggressively: Rubbing too hard will remove the finish and make the stain appear larger than it actually is.
- Using toothpaste on hot dashboards: Toothpaste can be a light scrub, but on a hot dashboard, it creates a pale stain.
- DIY repair in direct sunlight: When you try to repair a hot dashboard under the sun, you can’t control sanding or buffing properly.
When You Should Not DIY (Seek Help in Abu Dhabi)
You can’t fix every scratch on your dashboard at home. Some scratches can be permanently damaged if you use the wrong method. If you have any of the following conditions, it’s best to seek professional help rather than try a DIY approach.
- Dashboard cracked: Sanding or heating while the crack is still present will only spread it further; there is no permanent solution without professional repair.
- Scratch near the airbag area: If you try to do anything yourself here, the airbag system may be damaged, which is a major safety risk.
- Leather dashboard deep tear: You can’t repair deeply torn leather at home, and if you use the wrong color or filler, you’ll make the damage even more visible.
- Dashboard already sun-damaged: DIY heat or sanding on a sun-dried or cracked dashboard can further weaken the part.
- Electronics involved: If the scratch is near the screen, sensors, or dash controls, these are more likely to be damaged during DIY repairs.
It's safest to come to the best car wash center in Madaffah and get a free inspection.
How to Prevent Future Scratches
After repairing your dashboard, a few simple habits can go a long way toward keeping it looking good for a long time. Below are some simple habits that, if followed daily, can help prevent future scratches.
Use UV-protectant (essential in Madaffah)
The sun in Madaffa is very intense. Using a good UV-protectant regularly will:
- The dashboard does not dry out.
- Color does not fade
- Reduces the chance of scratches
Avoid placing metal objects on the dashboard
Keys, coins, phone holders, sunglasses, and any metal or hard object placed directly on the dashboard can easily get stained. Always keep these items in a cupholder or storage box.
Regular cleaning with a microfiber
If dust accumulates, it can create scratches when rubbed with your hands or a cloth. Regularly wiping it lightly with a microfiber cloth reduces friction on the dashboard.
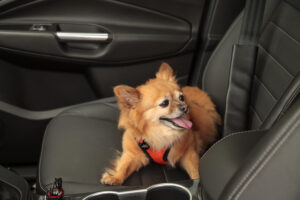
Keep pets away from the dashboard
Cat or dog claws can easily scratch the dashboard. If you bring a pet in the car, keep it in a seat or carrier.
Use a dash mat for desert heat
A good dash mat doesn’t just block the sun:
- Reduces heat
- Prevents scratches
- Keeps the dashboard looking new for a long time
FAQ
Can heat remove dashboard scratches?
A little heat helps with minor scratches, but excessive heat can damage the dashboard.
Is toothpaste safe for dashboard scratches?
Toothpaste only works on very light scuffs. Using it on a hot dashboard can cause the area around the scratch to fade, so be careful.
Do scratch removers work on vinyl dashboards?
Yes, it works well on light and moderate stains.
How to protect the dashboard from the UAE heat?
Use a UV-protectant, keep the car in the shade, and install a quality dash mat. These three are the most effective.
You may like!
How to Remove Pet Hair From Car Carpets (Madaffah, Abu Dhabi Guide)
How to Remove Pet Hair From Car Carpets (Madaffah, Abu...
Read More